 02/14 UPDATE: And the winners are ( drum roll please...) : Cookies: Ann Knee Dewinda Asri Agnita Tim Miller Cake Pops: Melissa Landes Franklin Cindy Palmer Cheryl Nodhturft Mori Dessert Table Backdrop: AI Kurokawa If your name is listed above, please contact me within 48 hours with your e-mail address, so I can send you your gift certificate. Congratulations the winners and thank you to everyone who entered! HAPPY VALENTINES DAY! Please note: The winners were chosen using random number generator ( www.random.org) .................................................................................................. Im overwhelmed by the amount of response and orders I have received for the last few weeks. I cannot believe its been only 6 weeks since I opened here in Yokosuka! You have filled me with love, and support and I 'd like to return the favor! Here is a list of the goodies
How to enter: Just comment and tag a friend under our FB post HERE. Please do not comment under shared post on other pages or groups – only under our original post on Kurabiiki’s FB page. (Its easier to keep track if everybody comments under the same post) Both you AND your friend will be automatically entered in the giveaway. So, go ahead, spread the love! Please note, this giveaway is open to Yokosuka, Yokahama and Tokyo residents only ( temporary or permanent) I would not ship cookies to USA or any other part of the world, so if you are not currently located in Yokosuka, Yokahama or Tokyo, please do not enter the giveaway. The lucky winner will be announced on 14th of February at noon Enjoy the rest of the month and don’t forget to check back with us next week and find out how to make these adorable penguin cookies. Step by step directions and links to all materials you need will be provided. You will be surprised how easy it is. 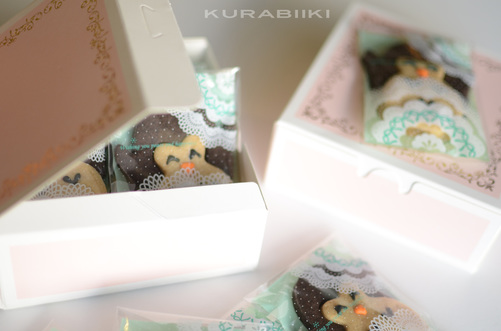 Interested in cookie decorating ?
Take your cookie decorating skills to the next level with one of our classes. Stay tuned - our Valentine's Day specials are coming by the end of this week! I would also like to mention that I will be taking very limited number of custom orders during March and April, so please place your orders in advance!
1 Comment
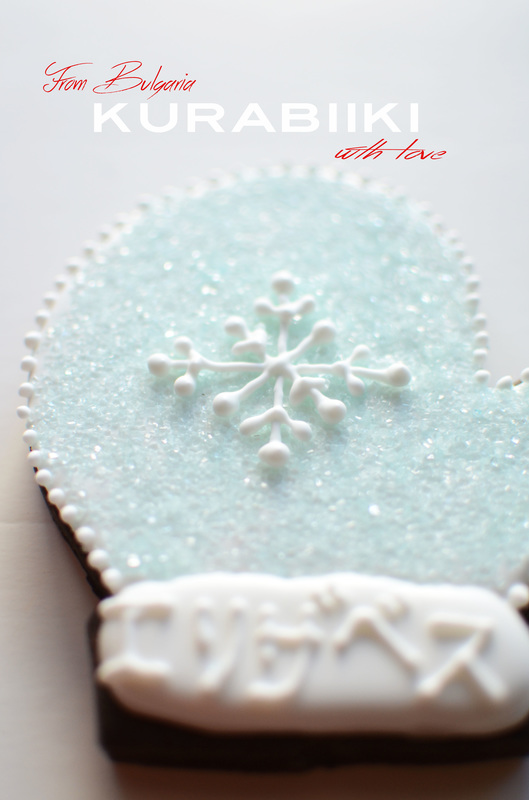
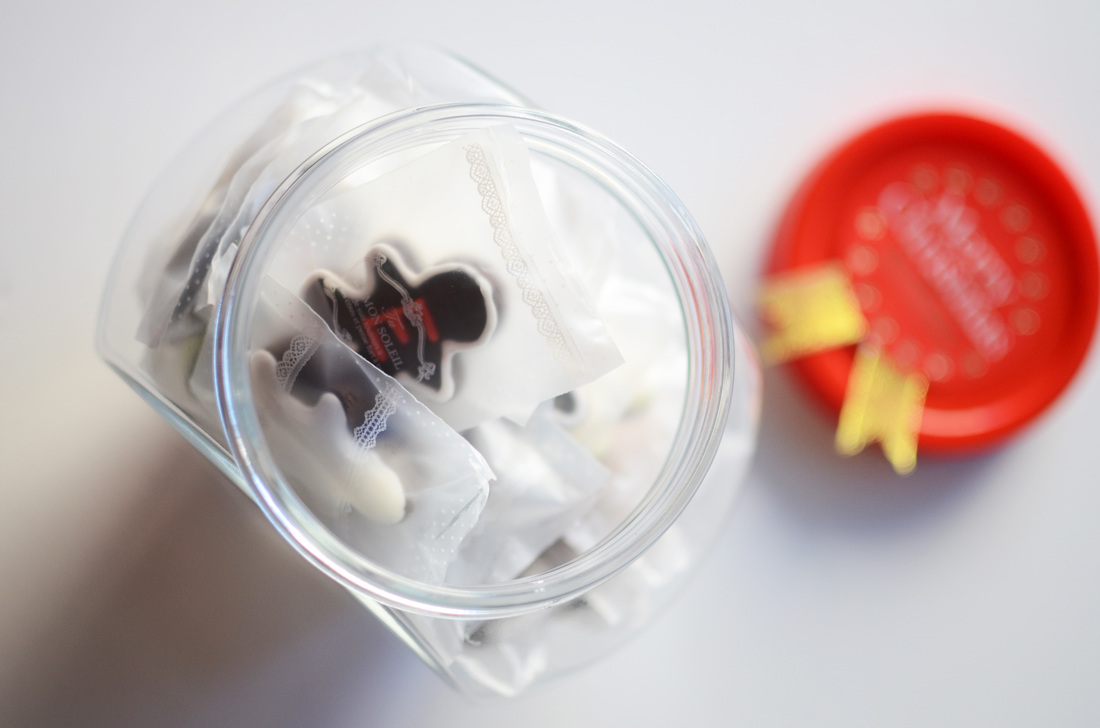
You may have noticed that things have been a little quiet lately. It's been a wild ride, and has been a while since I took my last order in Hawaii. However, moving to Japan and settling in took a little bit longer than we had anticipated. But our family has been having so much fun exploring this gorgeous country, with all of it's amazing sights and sounds! But to me, Christmas just wouldn't be the same without the delicious smell of gingerbread and sugar cookies permeating the house, and of course the mess from decorating them! That's why I am so excited to let everyone know that we are officially open for business again! While I won't be taking any custom orders until January, we do have some amazing December specials going on! Personalized Mitten Sugar Cookie These cookies make the perfect treat for stockings or tablescapes, or even adding a personalized touch to your Christmas gifts. We have five designs available, along with three flavors. Personalization is available at no extra cost to you (up to 7 characters.) Our Christmas mini cookies are freshly baked with all natural ingredients and made with love. Choose from three flavors, chocolate, vanilla, or lemon, or a mix of all three! They make a great Christmas day treat for all of your guests to munch on while dinner is cooking! All cookies are iced and wrapped individually. An order of 30 comes with a free cookie jar. Christmas PYC ( Paint Your Cookie) 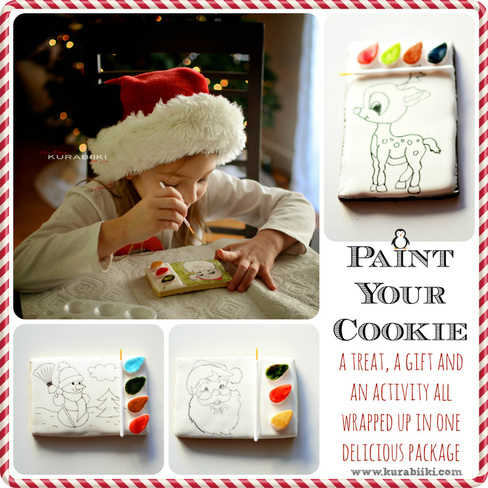 Start off a new tradition with your children this year with our Color Your Cookies! ( Christmas Designs are coming soon) They are a great way to enjoy cookies, without the mess of baking them! Entertain your little ones, who will adore painting their very own cookie treat, and then of course, the best part, getting to eat them! DIY Sugar Cookie Kit 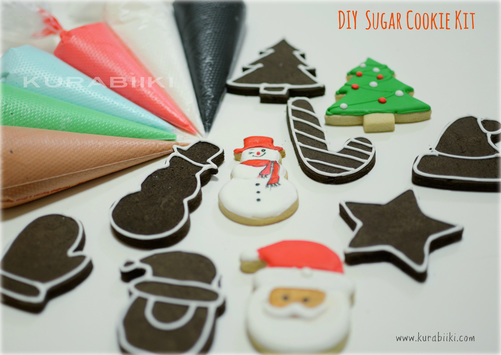 There is nothing like sugar cookies during the holidays. With our DIY Sugar Cookie Kit, everyone can get in on the fun! Our freshly baked cookies come outlined and ready to decorate. Our DIY set comes with a set of 5 ready-to-use icing colors, along sprinkles and detailed instructions. *NOTEAll Cookie orders have to be placed BEFORE December 15th. Pick up is available between December 18th and 22nd Cookie Decorating Classes Do you want to learn the art of cookie decorating? Awesome! Check out our cookie decorating classes. They will start on February 2nd, with 5 people per class, twice a week.
Reserve your spot today! February 9th, 2016 9 am - 12:30pm February 11th, 2016 9 am - 12:30pm Why Cookie Decorating? By learning the art of cookie decorating, you will not only be learning a new skill, but you can pass it along to your children, too! Have fun with it and create beautiful new memories with your little ones! You can create incredibly personalized touch to your gifts and notes. They make great party treats and favors, too! Why not start your own home business? Handmade decorated cookies can range anywhere from $2.50 to $6.00 per cookie. What a great way to make extra income, stay at home, and make your own schedule! As you can tell, we are very excited about the holiday season here at Kurabiiki! We're glad to be back and from our family to yours, we wish you a beautiful holiday season! HO-HO-HO! 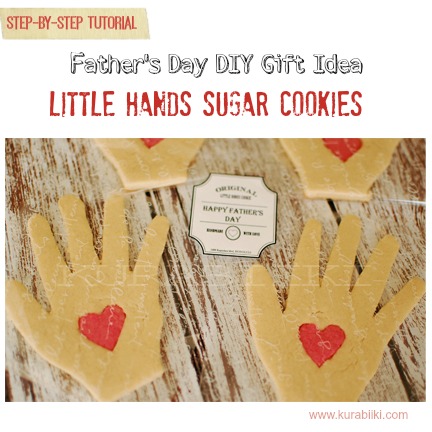 With Father's Day in just a few short days, why not bake up a batch of these sweet little treats for him? These cute cookies actually take on the shape of your little one's hands, making them the perfect treat, straight from the heart for Father's Day! We are going to show you just how to make them, too! Just simply follow the step-by-step tutorial we've outlined below for you, and soon your whole family will be enjoying scrumptious cookies! First, we will start with what you will need to create your cookie masterpiece: Little Hands Sugar Cookie Recipe 1 Cup of unsalted butter (warmed to room temperature) • 1 Cup of Sugar • 1 Large Egg • 1 tsp. Vanilla Extract • 3 Cups Flour • ½ tbsp. Salt • Cooling Rack • Parchment Paper or SILP Pad • The Outline of Your Children's Hand • Rolling Pin • Cookie Sheet • Red Food Coloring (My favorite brand to use is Americolor!) Father's Day Sugar Cookies Tutorial 1) Cream together the butter, sugar, egg and vanilla extract. In a separate bowl, sift together the flour and salt. 2) Step-by-step instructions for making and rolling your dough can be found at this link 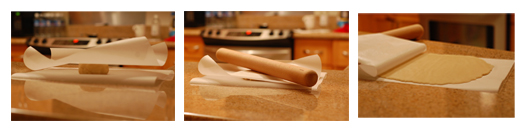 3) Trace your little one's hand onto a piece of paper(parchment, wax or regular paper), to create the template for your cookies! 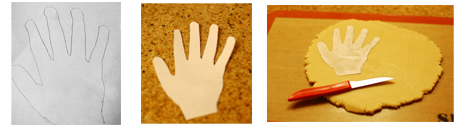 Once you've done that, you can place the template directly onto the dough and cut around it with a sharp paring knife. Tip: Chill your dough in the freezer for two minutes before and after you cut out the shapes. It is much easier to work with firm dough. 4) After you've cut out the shapes, remove the excess dough around the cookies using a pointed spatula or a paring knife. (chill your dough again if you have to) 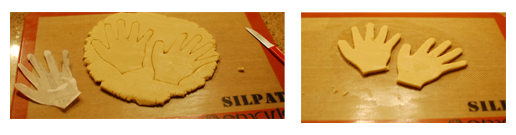 5) Use the red food coloring to dye a small amount of your dough. The red dough will be used to create the little hearts in the middle of the hand. Tip: I would suggest wearing food-safe gloves when dying your dough, to avoid staining your hands. 6) To create the heart, use a very small heart-shaped cookie cutter or a paper paper template to cut out the hearts. My daughter’s hand is very small, so I just fashioned a small heart on paper and create a template to fit the cookie size. 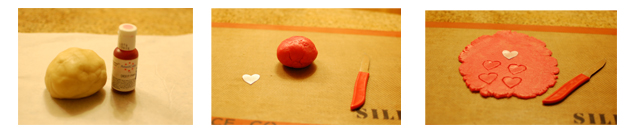 7) Chill the dough in the freezer for about two minutes before you remove the excess dough from around the hearts. Chill the hand-shapes for two minutes in the freezer as well. 8) Using the same template you used to create the hearts, cut out a heart shape in the middle of your dough hand shape. 9) Place the red hearts you previously cut out, into the middle of your hand cookies. 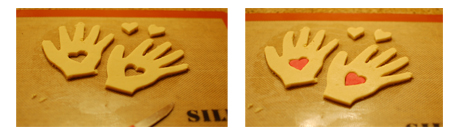 10) Chill in the freezer for another two minutes. Remove them from the freezer and slide the parchment paper (or SILP pad) with the cookies onto your cookie sheet. 11) Bake in an oven preheated to 375 degrees Fahrenheit for 7-10 minutes (depending on the thickness of your cookies) – or until the edges are a golden brown. **The cookies on the picture below are packed in ours scribble design bags, but you can use just a clear cellophane bags to pack your treats. However, packing your treats in a self-adhesive lip bags will extend their shelf life with at least a week. Enjoy! 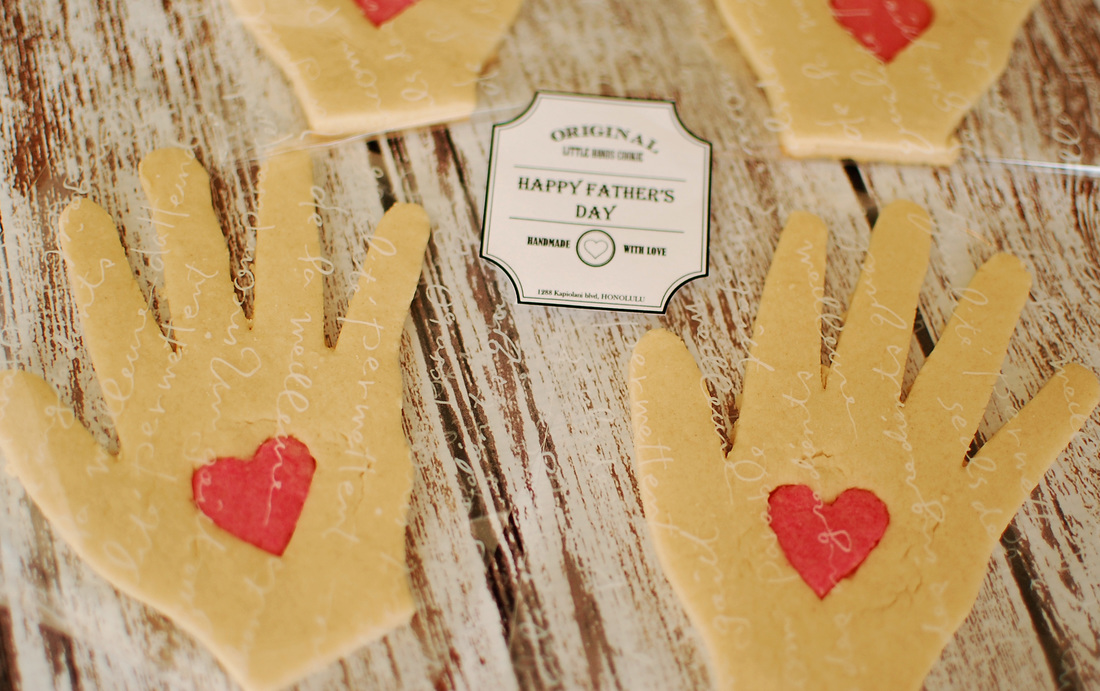 Please share comments and questions here or on our Facebook page! We would love to hear how your cookies turn out and see pictures!
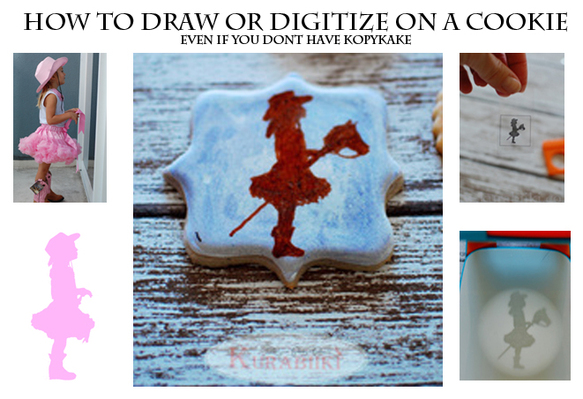 Kurabiiki-Cookie Decorating Tutorial I first began my adventures in the world of cookie decorating about three years ago, when I was planning my daughter's birthday party. I absolutely fell in love with it. However, it didn't take me long to realize that I'm not nearly as gifted as most of the cookie artists out there. It would take lots of practice, but I was up to the challenge! I began to focus my efforts and research. I attended the 2012 CookieCon convention, and I have to say, it was a total eye-opener for me. I was able to learn so many techniques and check out some amazing products that I didn't even know existed! More importantly, I was able to have the chance to learn from the best in the industry and try all of the “cool toys.” One product stood out among the rest. The KopyKake seemed to be the must-have product if you wanted to create amazing character cookies. It is a projector that lets you trace an image onto cookies, cakes, or any other pastry that you can decorate. If you cannot draw, or have poor handwriting, then this is absolutely the tool for you. I have to admit, I wanted it badly. Just thinking about all of the things I could create with it, so many cookies! Unfortunately, I did not have the room in my kitchen nor the money to spend on an expensive toy for my hobby. What I needed was an alternative, something smaller and cheaper that I could also hide away when my children were awake and running around - yes, I only decorate cookies at night, much like all you other moms! I searched high and low, but no matter how hard I looked and how much I thought, I simply couldn't come up with a solution. I tried tracing on wax paper, and I even used a tracing iPad application. But none of these techniques would produce the desired result I was looking for. I almost gave up looking, until one day I saw my daughter sitting quietly in her bedroom, tracing her favorite animals on paper. Then it dawned on me...if she could do it on paper, than I could likely do the same thing on a cookie! After a few days of testing out my theory, I realized that I had the perfect solution; a cheaper and smaller version of the KopyKake! I have put together a step-by-step guide to share with you so you can be on your way to creating beautifully scrumptious cookie creations in no time! --------------------------------------------------------------- You Will Need:
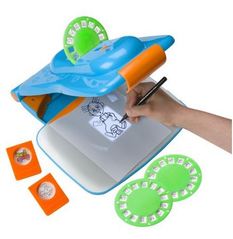 This toy works very similar to the KopyKake. Not as professional, but it's the perfect toy if you are beginner or you dont have the money to invest in a professional equipment. The main difference is that you will have to scale your image before you print it and start tracing. All images would need to be smaller than 1.5” X 1.5” in order to fit into the image box. This is actually simpler to do than you may think! Here Are The Steps Needed To Trace Your Image Onto A Cookie: 1) Open the template that I have created here. This is simply a Word document with 1.5” X 1.5” cells. 2) Once you have the document open, click in the first cell, then click 'insert' - 'picture.' This is assuming that your file is in either JPG, JPEG, TIFF, or BMP format. 3) Your image will most likely not fit into the box and you will need to resize it. Simply click on one of the corners and drag the angle until you have reached the designer's size (until your image fits the 1.5” X 1.5” box.) 4) It will be easier if your image is centered, however it is not a requirement to center your image. All you need to do is select the cell that your image is, right click, and simply select 'cell alignment.' Choose 'center.' 5) You are ready to print! 6) If you do have a printer at home, print your document on transparent film. I use a laser printer and a transparent film sheet. There are many different brands. Just make sure that the one you buy is compatible with your printer. Tip: To decrease the cost of printing per image, print more than one image per sheet. You can fit approximately 30 images within the Word template that you are using. 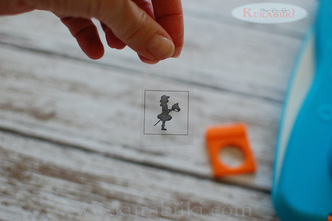 7. Cut your image and place it upside down within the small plastic box. 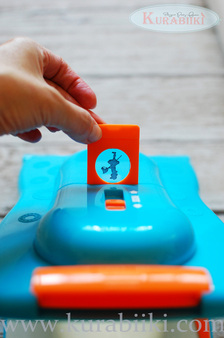 8. Voila! Now you are all set to start digitizing! 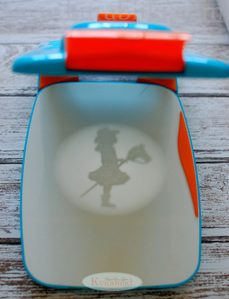 There is a little focus button at the top of the projector that will help you to adjust the sharpness of your image. 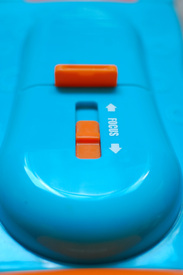 Sometimes, you may find that your image is slightly larger than your cookie. For example: 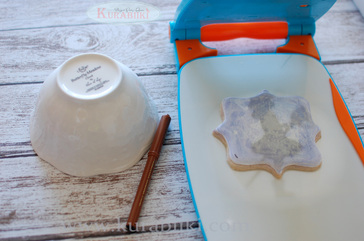 When this occurs, you have three options available: - You can either scale your image (make it smaller) and re-print it. But this can get expensive. - You can adjust the top of the toy by pushing it down. However, this can make it uncomfortable to digitize, since the toy is small already and you don't have a lot of room. - You can elevate your cookie. This is the method that I use. Since I cannot think farther than my kitchen, I usually just grab a bowl. Yes, you read that right, a plain ceramic bowl! Simply turn it upside down and place your cookie on it and you are ready to go again! 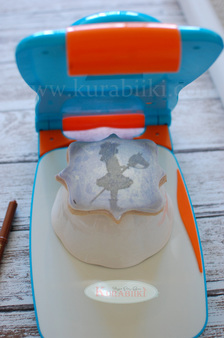 Here is the outcome and a few more cookies I decorate using the same toy 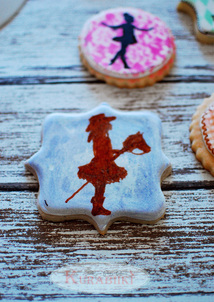  I would love to hear from you! If you have any questions, please do not hesitate to comment below. For more free decorating tutorials, tips and tricks, please follow me on Instagram Check out this tutorial on how to make cookie decorating rings! You would not believe how easy and fun these cookie rings are! 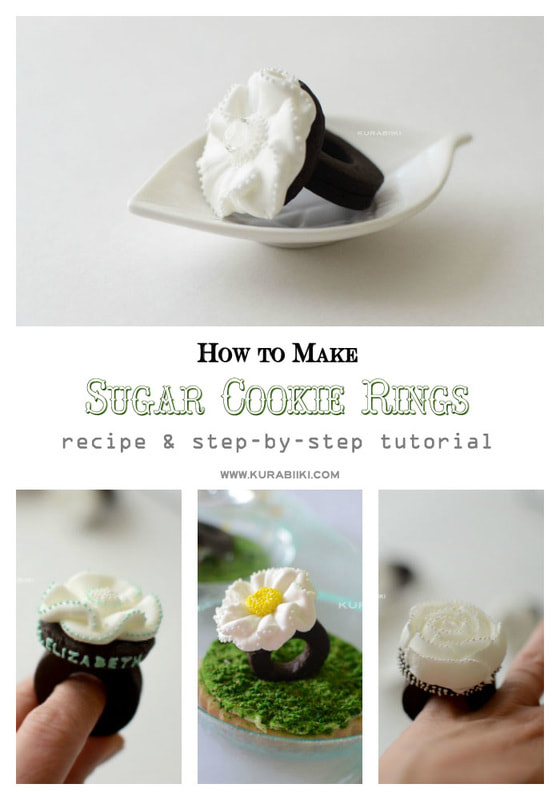 |
AuthorWelcome! I'm Silviya, a Mom of two beautiful girls and a wife to one amazing man. Find out more about me here Archives
January 2021
|


 RSS Feed